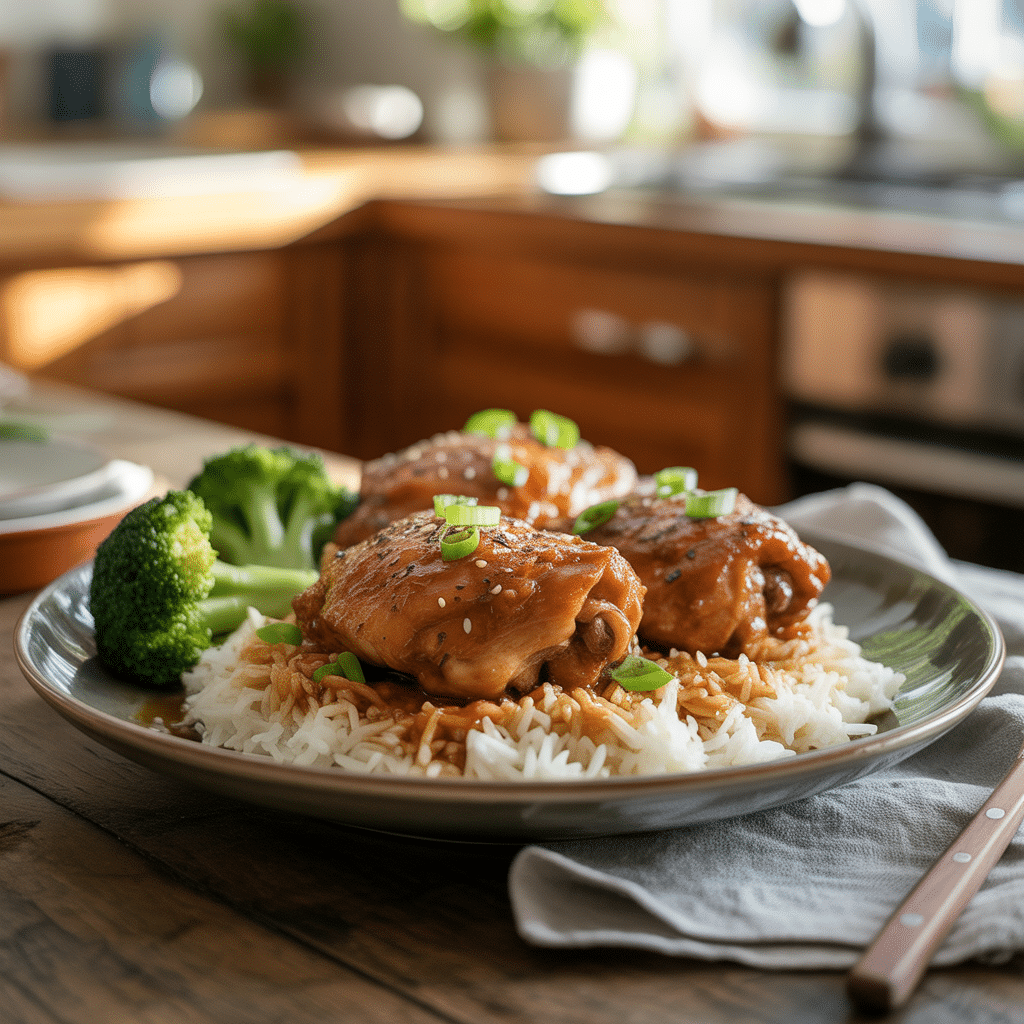
Is there anything better than a dinner that’s both incredibly delicious and surprisingly easy to pull off on a busy weeknight? I don’t think so. These Honey Garlic Chicken Thighs are a perfect answer to that exact question. They’re a go-to in my house because they hit all the right notes: sweet, savory, sticky, and so, so flavorful. Forget dry chicken forever—thighs are the juiciest, most forgiving cut for home cooks. So, let’s make something delicious together.
Why You’ll Love This
You’ll love this recipe because it feels like a treat without requiring fancy skills or a mountain of ingredients. The sauce is the real superstar here, caramelizing into a gorgeous, glossy glaze that coats every bite. It’s a one-pan wonder, meaning cleanup is a total breeze. And honestly, I think this dish is even better than takeout. It’s the kind of simple, satisfying meal that makes you feel like a weeknight hero.
Ingredients You’ll Need
- 8 bone-in, skin-on chicken thighs: They stay juicy and the skin gets wonderfully crispy.
- Salt and black pepper: For seasoning the chicken perfectly.
- 2 tablespoons olive oil: For searing and building the sauce base.
- 4-5 cloves garlic, minced: The essential savory partner to the honey.
- 1/3 cup honey: For that signature sweet, sticky glaze.
- 1/4 cup low-sodium soy sauce (or tamari): Adds salty, umami depth.
- 2 tablespoons apple cider vinegar: A little tang to balance the sweetness.
- 1/2 cup chicken broth: Helps create more sauce and keeps everything moist.
- 1 tablespoon cornstarch + 1 tablespoon water: Mixed together to thicken the sauce at the end.
- Optional garnish: Sliced green onions and sesame seeds.
Let’s Get Cooking Step by Step
- Pat the chicken thighs completely dry with a paper towel. This is the secret to getting that crispy skin! Season both sides generously with salt and pepper.
- Heat the olive oil in a large skillet over medium-high heat. Once the oil is shimmering, add the chicken thighs skin-side down. Sear for 5-7 minutes without moving them, until the skin is golden brown and crispy. Flip and cook for another 5-6 minutes on the other side. Transfer the chicken to a plate; it won’t be fully cooked through yet.
- Reduce the heat to medium. In the same skillet, add the minced garlic and sauté for about 30 seconds until fragrant. Be careful not to burn it!
- Pour in the honey, soy sauce, apple cider vinegar, and chicken broth. Use a whisk to scrape up all those delicious browned bits from the bottom of the pan. Let the sauce come to a gentle simmer.
- Return the chicken thighs to the skillet, skin-side up. Spoon some of the sauce over the top. Reduce the heat to low, cover the skillet with a lid, and let it simmer for 15-20 minutes, or until the chicken is cooked through and registers 165°F on an instant-read thermometer.
- Remove the cooked chicken to a serving platter. Whisk the cornstarch and water together in a small bowl to make a slurry. While the sauce is still simmering, whisk in the slurry. Cook for another 1-2 minutes until the sauce thickens beautifully. Pour the sauce over the chicken, garnish with green onions and sesame seeds if you like, and serve immediately.
Delicious Variations & Substitutions
This recipe is wonderfully adaptable. For a little heat, add a pinch of red pepper flakes or a tablespoon of sriracha to the sauce. If you’re out of apple cider vinegar, fresh lemon juice works just as well. For a deeper flavor, you can use a tablespoon of balsamic vinegar alongside the broth. If you prefer shredded chicken recipes, you can use boneless, skinless thighs and simply shred the cooked meat right into the finished sauce. And for a quick dinner idea using a store-bought rotisserie chicken, shred the meat, warm it in the prepared sauce, and serve over rice.
Perfect Honey Garlic Chicken Thighs Tips
- Don’t skip drying the chicken skin. A dry surface is non-negotiable for maximum crispiness.
- Let the chicken sear undisturbed. This builds a gorgeous crust you just can’t get if you move it around.
- Use an instant-read thermometer. It takes the guesswork out of cooking and ensures perfectly juicy chicken every time.
- If your sauce seems too thin after adding the slurry, just let it simmer a minute longer. If it’s too thick, splash in a little more broth.
- Honestly, if you’re feeding a crowd, just double the recipe. It scales up perfectly.
- And have fun with it! Cooking isn’t about being perfect—it’s about sharing a tasty meal.
Storage & Reheating Instructions
Store any leftovers in an airtight container in the refrigerator for up to 4 days. To freeze, place the cooled chicken and sauce in a freezer-safe container for up to 3 months. Thaw in the fridge overnight before reheating. The best way to reheat is in a covered skillet over low heat with a splash of broth or water to keep it moist. You can also use the microwave, but be sure to cover it and heat in short bursts to prevent the chicken from getting rubbery.
Serving Ideas & Pairings
This dish is a superstar served over a bed of fluffy white rice or jasmine rice because it soaks up all that amazing sauce. But it’s also fantastic with mashed potatoes, roasted sweet potatoes, or even simple buttered noodles. For healthy dinner ideas, pair it with a light side salad or some quick-steamed broccoli and snap peas. It’s a complete, satisfying meal that everyone at the table will love.
Frequently Asked Questions
- Can I use chicken breasts instead of thighs? You can, but be very careful. Chicken breasts are much leaner and can dry out faster. If you’re looking for chicken breast dinner ideas, I’d recommend pounding them to an even thickness and reducing the simmering time to 10-12 minutes, checking for doneness at 165°F.
- Is this recipe gluten-free? Absolutely! Just ensure your soy sauce is a certified gluten-free tamari.
- My sauce isn’t thickening. What can I do? Make sure your slurry is well-mixed and that the sauce is at a simmer when you add it. If it’s still thin, mix another half-tablespoon of cornstarch with water and whisk it in.
- Is this one of those quick and easy dinner recipes? It sure is! From start to finish, you’re looking at about 45 minutes, and most of that is hands-off simmering time. It’s a perfect solution for a busy night.


