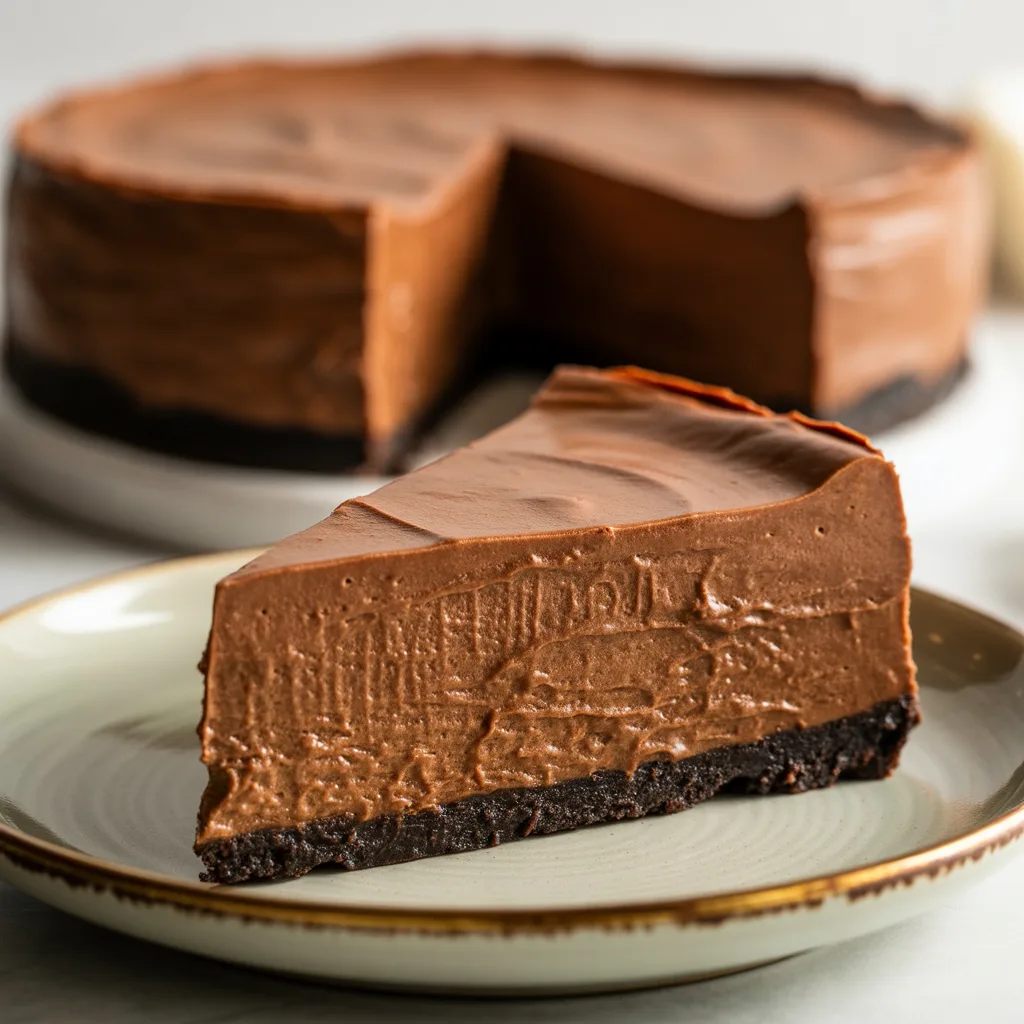
Is there anything more satisfying than a rich, creamy slice of chocolate cheesecake that you don’t even have to turn on the oven for? Especially one that sets up with an impossibly smooth finish? I’m talking about a dessert that feels fancy enough for a dinner party but is simple enough to whip up on a busy weeknight. This No-Bake Chocolate Cheesecake with Smooth Finish is that recipe. It’s your new secret weapon for a stunning, crowd-pleasing dessert that comes together in a flash. Let’s get started.
Why You’ll Love This
This cheesecake hits all the right notes. It’s luxuriously rich but not overly heavy, and the no-bake method means it’s practically foolproof. No water baths, no worrying about cracks—just a silky, decadent chocolate filling that sets beautifully in your refrigerator. Plus, you can make it a day ahead, which is a lifesaver when you’re planning a meal. It’s one of those best cheesecake recipes you’ll come back to again and again.
Equipements Needed
- 9-inch Springform Pan: Essential for getting that beautiful, clean slice.
- Food Processor: For blitzing the crust ingredients into fine crumbs.
- Electric Hand Mixer or Stand Mixer: To get that perfectly smooth and fluffy cheesecake filling.
- Rubber Spatula: For scraping down the bowl and folding gently.
- Measuring Cups and Spoons
Ingredients
For the Crust:
- 2 cups chocolate sandwich cookie crumbs (about 24 cookies): Creates a fudgy, flavorful base.
- 6 tbsp unsalted butter, melted: Binds the crumbs together for a perfect crust.
For the Filling:
- 24 oz (three 8-oz blocks) full-fat cream cheese, softened: The star of the show. Full-fat is key for the right texture.
- 1 cup powdered sugar: Sweetens without graininess.
- 1/2 cup unsweetened cocoa powder, sifted: Provides that deep, rich chocolate flavor.
- 1 tsp pure vanilla extract: Enhances all the other flavors.
- 1/4 tsp fine sea salt: Balances the sweetness and makes the chocolate pop.
- 1 1/2 cups heavy whipping cream, cold: Whipped to soft peaks to lighten the filling and help it set.
Step By Step
- Make the crust: Combine the cookie crumbs and melted butter in a bowl until it resembles wet sand. Press the mixture firmly and evenly into the bottom and about halfway up the sides of a 9-inch springform pan. Pop it in the fridge to set while you make the filling.
- Start the filling: In a large bowl, use an electric mixer to beat the softened cream cheese on medium speed until it’s completely smooth and lump-free. This should take about 2 minutes. Scrape down the sides of the bowl.
- Add flavor: Beat in the powdered sugar, sifted cocoa powder, vanilla extract, and salt. Mix on low until combined, then scrape the bowl again and mix for another 30 seconds to ensure everything is fully incorporated.
- Whip the cream: In a separate, clean bowl, whip the cold heavy cream until it holds soft peaks. Be careful not to overwhip it into stiff peaks.
- Combine: Gently fold the whipped cream into the chocolate cream cheese mixture in two additions. Use a spatula and fold slowly until no white streaks remain. The goal is to keep it light and airy.
- Chill: Pour the filling into your prepared crust and smooth the top with your spatula. Cover the pan with plastic wrap and refrigerate for at least 8 hours, or preferably overnight. This patience is the secret to that perfect, clean slice.
Cheesecake Decoration Ideas
The cheesecake aesthetic is all about making it your own. A simple dusting of cocoa powder or chocolate shavings is elegant and easy. For a pop of color and tartness, fresh raspberries are a classic pairing for any raspberry cake or cheesecake. You can create a ring around the edge or a pretty pile in the center. A drizzle of melted chocolate or a generous swirl of whipped cream right before serving also works beautifully. For a Biscoff cheesecake vibe, swirl melted Biscoff cookie butter on top and add a few extra crumbled cookies.
Variations & Substitutions
- Gluten-Free: Use gluten-free chocolate sandwich cookies for the crust.
- Dairy-Free: Swap the cream cheese for a plant-based alternative, use coconut oil in the crust, and chill a can of full-fat coconut milk to replace the heavy cream (use the solid part only).
- Flavor Twist: Fold in 1/2 cup of chopped mint chocolates or a tablespoon of instant espresso powder for a mocha version.
- Crust Swap: Graham crackers or vanilla wafers make a great classic crust, but personally, I think the chocolate crust is non-negotiable for maximum chocolate impact.
Serving Ideas & Pairings
This cheesecake is fantastic all on its own, but it also plays well with others. It’s the perfect centerpiece for a table of mini desserts. For a real showstopper, serve it with a side of fresh berries, a dollop of freshly whipped cream, and maybe even a scoop of vanilla bean ice cream. A cup of strong coffee is my absolute favorite pairing—it cuts through the richness perfectly.
Storage & Reheating
This cheesecake stores beautifully. Keep it covered in the refrigerator for up to 5 days. For longer storage, you can freeze it. Wrap the whole cheesecake (or individual slices) tightly in a layer of plastic wrap and then a layer of aluminum foil. It will keep in the freezer for up to 2 months. Thaw overnight in the refrigerator before serving. Do not try to reheat it—this is a cold dessert!
Frequently Asked Questions
- Why is my filling too soft? The most common culprit is not whipping the heavy cream to soft peaks or not chilling the cheesecake long enough. It needs a full 8 hours to set properly.
- Can I make individual servings? Absolutely! This recipe is perfect for turning into mini desserts. Just divide the mixture among mason jars or small glasses and chill.
- What are some other good cheesecake toppings? Besides fresh fruit, try a salted caramel sauce, a chocolate ganache, or even a fruit curd. Get creative with your cheesecake decoration!
- My cream cheese was a little lumpy. How can I prevent that? Make sure your cream cheese is truly softened at room temperature for at least an hour. And beat it by itself until it’s completely smooth before adding any other ingredients.
")